-
Grain Direction

The grain of the fabric runs across the width of the roll. Imagine the roll at the top, with unrolled fabric extending downwards. The grain would be visible from the right to left of the material.
If the direction of the grain is something that you need to consider, you will need to ensure you add and position your file(s) on the design interface keeping the grain direction in mind. This will be across the width (left to right) of the design interface, just as it will be across the width of the fabric.
For your own reference, we will print your fabric design in the orientation that it is displayed in the online preview. This is of much higher importance if your custom fabric is for making clothing. This is due to the stretch, for example of our jerseys, running across the width of the roll.
Please note: If you select a custom width which wider than the fabric you have chosen, then we will rotate by it 90° in order to fit it on the roll.
-
Fabrics & Colour variations
![]()
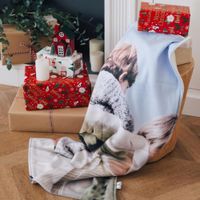
Colour variations from an identical image file should be expected to some degree across various fabrics.
Each fabric base has a different base tone and varies in colour, light reflectivity, thickness, weight, opacity and weave. They may all have an impact on the print colour as well as the appearance of the print colour.
Also various lighting conditions makes printed fabrics colour seemingly vary.
We do endeavor to ensure all of our printers are calibrated for each and every fabric, however the above must be taken into consideration when ordering the same graphic or colours across various types of fabrics and ink sets. Choosing similar weaves and weights can help to ensure your colours look as brilliant as desired.
Please note as well that every once in a while, our printing team tweaks printer calibrations to refine colours. They are constantly on the lookout for new and improved ways to print, strengthening print processes and improving colour precision wherever possible. We might also upgrade our machinery to optimise printing outputs. These can result in some colour variations between two identical orders on the same fabric. These will be minimal however still slightly visible. In case some colour variations may impact your work and you wish to re-order after a certain time, we do advise to order new fabric samples shortly before your larger print run. This will ensure you receive prints with a the closest colour accuracy possible.
Our inks are also water based. None of our fabrics or inks contain or use Azo dyestuffs. No contaminants of any kind enter the water course thanks to our eco-friendly print process. Read more about Sustainability here.
-
Pantones & Color Profiles
![]()
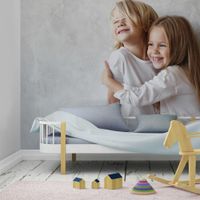
We advise providing images in the RGB colour space. Specifically using the sRGB image profile, to achieve best colour results.What does this mean? In your editing software choose RGB as the working space, and assign the image profile as sRGB (full name sRGB IEC61966-2.1)
PANTONES actually refer to the “pantone textile colour libraries”. The pantone “coated and uncoated” colour mixes are for laser and lithographic printing and so not suitable for textile printing. Pantones should be created within a CMYK colour space. We do try to closely match pantones, though due to the nature of our printing an exact match is not always possible. An exact pantone match is essential? Please contact us prior to ordering.
MONITORS & PRINT
Only specialist graphic monitors under strict lighting conditions can reproduce printed colours. An average laptop or PC screen will look good, but will not necessarily be accurate, not to mention that a lot of the colours are so bright that printers cannot reproduce them. For further information, search for “subtractive colour vs additive colour” to understand the limitations of colours on monitors and printed media.
CONTINUITY OF COLOUR
Repeat orders? Keep your colour space and profiles consistent. If you upload a file as rgb and then order later again with a cmyk profile there will be a difference in the way printers translate all colours, resulting in different perceived colours on the finished item.
BLACK AND WHITE
For best neutral black and white, uploading your file as a greyscale file.
SPOT COLOURS, UV
Though we do not use spot colours or UV and true metallic or gold colours cannot be achieved, you can get very close results by selecting a fabric with a shine such as Duchess Satin (use our fabric filters to find the matching fabric) and use a pattern with a golden or metallic texture. You could also use the colour codes e3c157 (gold) and d0d0d0 (metallic) however the result will be plainer than with a textured pattern. We do advise to start with a personalised fabric.
You can only upload PNG, JPG and flattened TIFF files. If you upload unflattened tiffs this will cause unintended changes to your design which are not visible on the interface.
-
Cutting, Hemming Options & Allowance
![]()
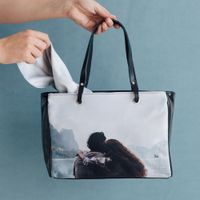
Cutting of the fabrics:
We have four finishing options for your fabric order:
- As it comes. We cut around your image, leaving a simply scissor cut, perhaps uneven white fabric border.
- Hem with thread. We can hem your fabric with a choice of black or white thread. See below for information on how this affects the size of your print.
- Cut on the line. We will cut neatly on the edge of your image.
Hemming Options & Fabric shrinkage
At Contrado, we have our own
in-house stitching department, and are able to hem your printed fabrics for a
small extra fee (option to select on the design interface after clicking on "Start Design" and selecting the fabric dimensions.
We offer either a folded hem (single or two fold dependant on the fabric) which uses a straight stitch, and an overlock hem - which stitches over the edge of your material, both black or white. Some fabrics will work better with one particular hem type, and won't be compatible with the other - for those you will only be given the suitable option. If you see both options, then it's down to you which you would prefer.. However, please
be aware that hemming options will reduce the size of your finished piece: A
100cm x 100cm square of fabric will measure approximately 98.5 x 98.5cm once
hemmed. If you want to retain the original size, you’ll need to make your
print larger to compensate.
Average Shrinkages by fabric are:
-
Light Fabrics & Silks: a 6-8mm 2-fold hem. Minus 12-16mm per side.
-
Medium Fraying Fabrics: a 15-20mm 2-fold hem. Minus 35-40mm per side.
-
Stiff, Heavy, & Non-Fraying Fabrics: a 15-20mm 1-fold hem. Minus
15-20mm per side.
Measurements are approximate,
and can vary. Please take fabric printing shrinkage values (2-8%) into account in addition to hemming
options.
-
Preparing your artwork
![]()
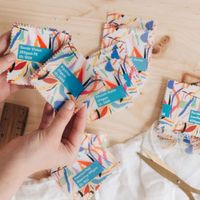
Our online preview will
accurately advise whether your uploaded graphic is of sufficient quality to
print at the physical size you have selected. If you see a low quality warning
you have a few options to ensure your print is as sharp as possible. Some advice below:
- Reduce the size of your
graphic and tile. You can reduce the size of your graphic until the LQ warning
is removed, then use our variety of tiling options to fill your print area.
- Reduce the size of your
graphic and add a complimentary background colour. Again reduce your graphic
size until the LQ warning goes away.
- Using software to upscale.
WARNING this can adversely
further reduce the quality of your graphic, and should only be used as a last
resort. Recapturing the image at a higher resolution is best practice if
possible. In any case do not just increase the resolution (dpi) of a file as it will only trick online systems to believe the new design would be of higher quality when it in fact would not have changed at all.
Using the image size dialogue in
Photoshop or other designer tool you can resample your image via Preserve Details (enlargement) or
Bicubic Smoother (enlargement) > then increase the resolution or
width/height.
Resampling your image means that
what was one pixel is enlarged into many more. This will increase the size of
your graphic (in terms of file size, physical size and resolution) but will not
necessarily increase the quality, straight lines and fine details can become
fuzzy. Careful sharpening after enlarging can bring detail back into focus.
Photoshop plugins such as “Real
Fractals” can do a better job of enlarging, there are many more available for a
small fee or free of charge.
If your graphic is fairly simple
(low details, low number of colours) you can import into Adobe Illustrator and
use its image trace preview, playing around with the settings to get an
accurate trace of your image.
Always export your image at max
quality, using formats such as flattened tiff or PSD when editing, and only saving to a
jpeg when you are uploading your file for print.
-
Design Errors & Failed Designs
![]()
In order to maintain a high standard of quality, our design interface notifies you if your design is not quite right. Here's what you need to know.
Waiting for Approval
Our system is processing your design, then it will be published.
Out of Stock
The product is out of stock. Check back regularly or sign up for an email notification on the product page.
Design Errors
Low quality images: you've uploaded an image that won't print with the best quality. To amend this, either shrink your image or upload a new image that is higher quality. Try creating a repeat pattern as well.
Very small images: you've uploaded an image that is too small to see clearly. To amend this, enlarge your image until it's acceptable quality or replace with a higher quality image.
White space detected: you haven't covered the entire surface of your product, so part of it is left white. To amend this, please enlarge the image or apply a repeat pattern to cover the full surface including the bleed area. If this was intentional, apply a white background colour using the hex code: #ffffff
Text too close to edge: you've added text too close to the edge of the panel and it's overlapping with the bleed area (in red). To amend this, please move your text out of the bleed area and away from any edges to ensure it prints correctly.
Incomplete design: you've either left a panel of your product only partially designed, or didn't design a panel of your product. To amend this, please review all the panels of your product and ensure they're all covered. If you'd like to leave part of your design white, apply a background colour using the hex code: #ffffff
Offensive words: you've included one or more offensive words in your design. To amend this, please remove the offensive word.
Brand words: you've entered the name of an established brand on your design. To amend this, please remove the brand's name.
Failed Design
Our system was unable to process your design. Please try again and resubmit it.